
Have you ever spent time on the job looking for a specific tool you thought was in your toolbox? Have you ever cut yourself rummaging through a sea of tools trying to find a specific tool? Do you carry multiples of the same tool of differing quality that could cause you to choose and use a poor quality tool and potentially damage equipment or injure yourself? Have you ever spent time looking for a tool that wasn’t in your toolbox forcing you to leave the jobsite to go find a replacement?
If you answered yes to any of the above questions, or, truthfully, if your toolbox resembles the one shown below in Fig. 1, maybe it’s time to begin organizing it.
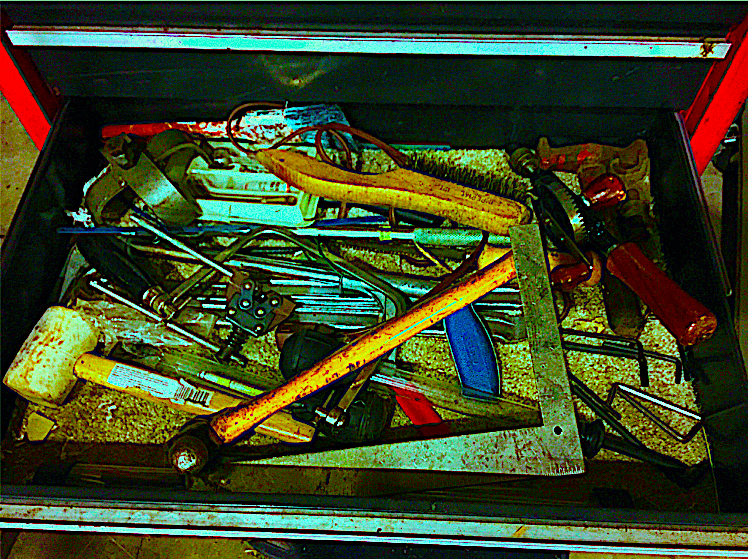
Fig. 1. An all-to-common disorganized-toolbox
Although there is no definitive study on time spent and wasted looking for tools, most readers will relate to and recognize the time and wellness benefit of working with organized workspaces and inventory. A maintainer’s toolbox is an intimate workspace and organization is paramount for performing work excellence in a safe manner.
ADOPTING A 5S APPROACH
Granted, there’s no right or wrong way to organize a toolbox. But utilizing the Japanese 5S approach to organizing a workspace will facilitate consistency by ensuring a place for every tool and every tool having its place.
5S Step 1: SORT. This is where we sort our tools into groups or types, e.g. screwdrivers, wrenches, measuring tools, sockets, striking tools, etc. Once the tools are grouped, the second level sort begins to weed out broken tools, duplicates, and inferior quality tools. Giving up tools, even inferior tools, is never an easy decision especially when tools have sentimental value, but a necessary steps toward organization. Every maintainer has his, or her, primary and essential tools employed in continuously use and that require easy access on a daily basis. The rule of thumb is an “active”, or daily working toolbox, should be set up only with tools that have been used in the past three months. One-off tools that only see occasional use can be inventoried, organized, labelled and stored in a separate specialty tool space/cabinet/box(es).
5S Step 2: SET IN ORDER. With your newly edited “active” tool inventory it is time to assess the space afforded by your toolbox and divide the space so each tool has its own unique space making it easy to recognize, put away, and find every time the drawer is opened. Achieving this can be accomplished in a number of ways:
- Purchase a universal hard-plastic toolbox-organizer tray similar to the wrench tray shown in Fig. 2. These types of trays are sold in most hardware and home-improvement stores and through many online sites.
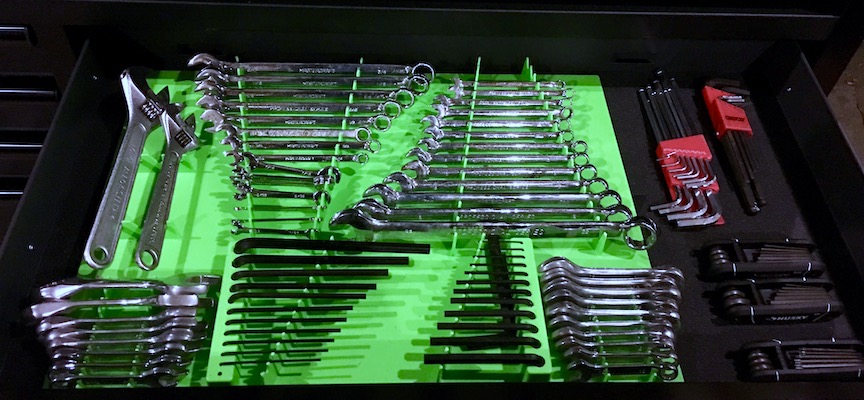 Fig. 2. Universal hard-plastic toolbox organizer trays are available at most
hardware or home-improvement stores or through many online sites.
- Purchase a pre-formed, CNC cut, foam insert, such as those manufactured by FoamFit Tools, Green Bay, WI (foamfittools.com), for all major tool brands (see example insert for a Husky socket-set shown in Fig. 3). Just measure your tool drawer’s internal dimensions and order the pre-formed organizer for your tool type.Note the two colors in the foam insert below. This identifies the tool profile or outline (in the lower color) and, thus, indicates the tool’s unique place and allows immediate recognition that the item is in use or, otherwise, missing from the toolbox. Color coding facilitates rapid tool inventory checks when the job is complete.
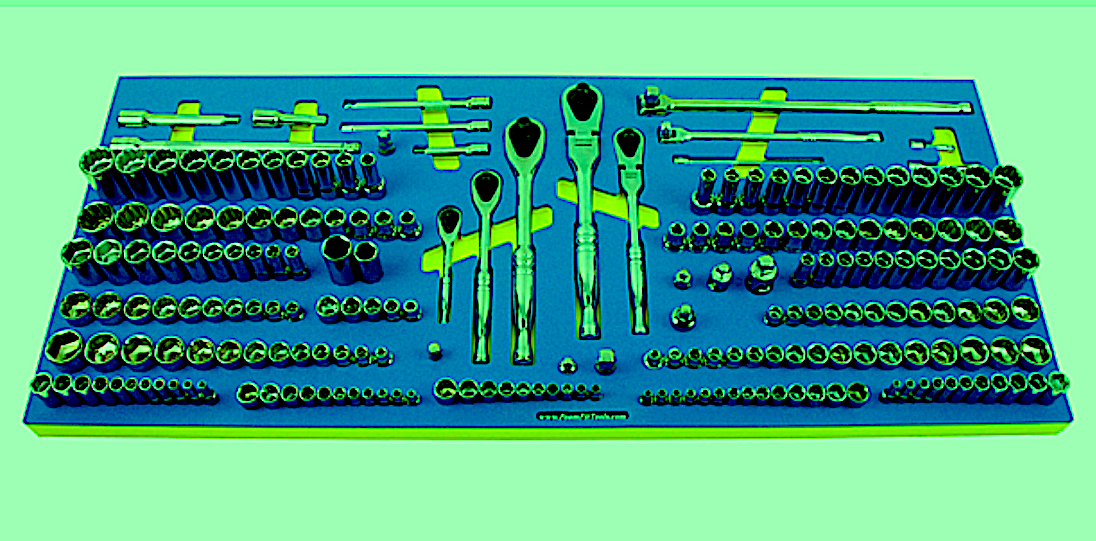 Fig. 3. Pre-formed Foamfit Tools Husky socket-set toolbox organizer
(Image courtesy of foamfittools.com)
- Purchase your own soft or hard foam and make your own customized organizer. This foam can be easily purchased, along with a kit and easy instructions on how to successfully make your customized insert from numerous online providers. Products may differ in their construction, g.,FoamFit Tools provides color-backed hard foam for customization, as well as a plain, all-black version known as kaizen foam made up of stacked foam layers about 3/8-in. thick that can be cut and peeled away to accommodate three-dimensional shaped cut-outs. Foam can also be color-keyed to represent different tool groups or types.The key for successful customized tool inserts lies in the preparation as follows:
-
- Measure your drawer size and cut foam blank to drawer size
- Arrange your tools on top of the foam according to how you would like to access the tools leaving enough space between each tool for the foam to keep it in place and add a label if required
- Take a photograph of the arrangement. This can be printed and kept as your cutting placement guide and to build your own tool manual (especially useful for locating and retrieving occasional use stored tools)
- Draw a cutline, or immediately commence cutting around your first tool as per the foam type. Foam can be cut and trimmed using a foam hot knife, scalpel or box cut knife; certain foam types will necessitate frequent blade changes.
- Don’t be afraid to leave an open space or two with no cut-outs to accommodate future tool additions
5S Step 3: SHINE. Prior to placing the tool in its rightful place, it needs to be cleaned and shined. If the tool shows signs of rust, a naval jelly (can be purchased from any hardware store or supplier) and wire wool buffing can be applied to restore the tools finish. A clean tool demonstrates professionalism and is easier to use.
5S Step 4: STANDARDIZE. By using foam inserts in all drawers and labelling each tool a standard is now in place. If the corporation provides a complete tool kit for all maintainers, then each toolkit should be identical in lay out, with the same tools from the same manufacturer making it easy to inventory and maintain.
5S Step 5: SUSTAIN. Audit your toolbox regularly. Check to ensure all tools are in excellent working condition, lubricated or sharpened (if required) and clean.
BOTTOM LINE
Making a transition to an organized toolbox will, of course, create a little pain and require a bit of effort in the beginning. The result, however, will pay dividends at the job site, and you may even get positive comments from clients and/or others in your work life.TRR
ABOUT THE AUTHOR
Ken Bannister has 40+ years of experience in the RAM industry. For the past 30, he’s been a Managing Partner and Principal Asset Management Consultant with Engtech industries Inc., where he has specialized in helping clients implement best-practice asset-management programs worldwide. A founding member and past director of the Plant Engineering and Maintenance Association of Canada, he is the author of several books, including three on lubrication, one on predictive maintenance, and one on energy reduction strategies, and is currently writing one on planning and scheduling. Contact him directly at 519-469-9173 or kbannister@theramreview.com.
Tags: reliability, availability, maintenance, RAM, hand tools, toolboxes, 5S