Infrared (IR) inspections are now routine for many facilities. By proactively addressing incipient or latent failures detected during a single inspection, costs associated with unscheduled downtime and damage to electrical and mechanical equipment can be avoided. Even greater savings can be achieved through a properly designed and managed infrared-inspection program.
An infrared program is an engineered predictive maintenance (PdM) approach that will provide a system for instituting, adapting, and continually improving infrared inspection activities to provide long-term value and maximum payback to the facility.
In general, the following nine steps are applicable to any type of PdM program. The principles will work for setting up or improving an existing program. Note that such programs may be instituted by in-house inspection teams or professional consulting firms that provide contract services for client facilities.
STEP 1: Determine What to Inspect
The first step in setting up an infrared inspection program is deciding which systems or units to inspect. To do this, one must determine what systems are best suited for infrared inspection within the facility.
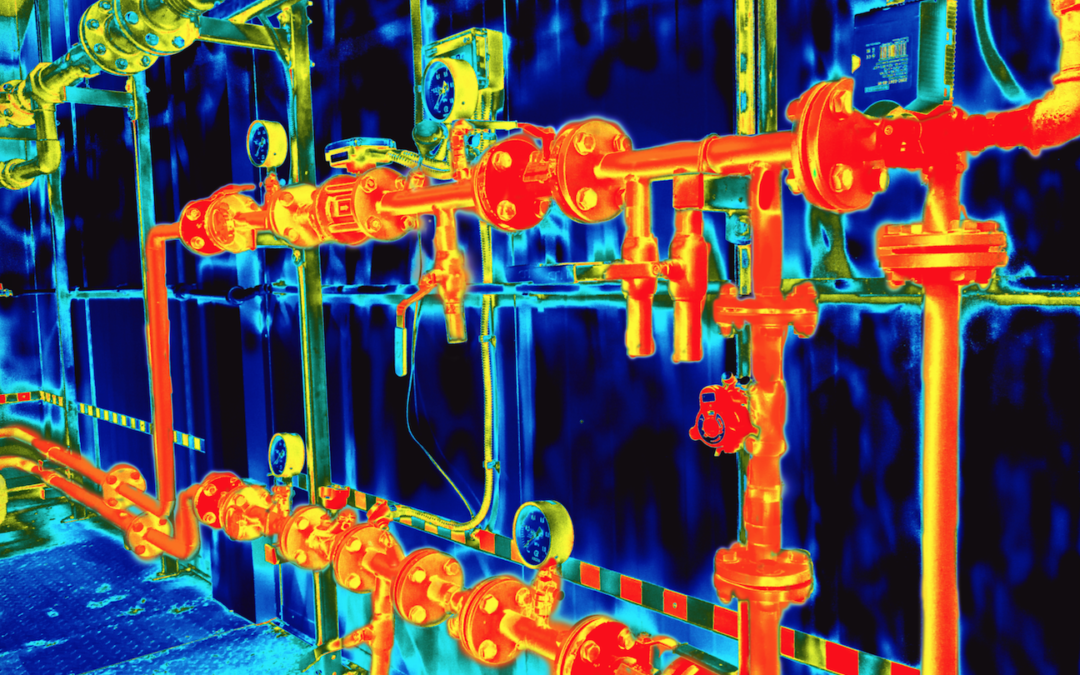
Typically, systems where failures are accompanied by a change in operating temperature prior to failure are excellent candidates. They include: electrical systems, mechanical systems, rotating equipment, process equipment, boilers and steam systems, insulated structures, and flat roofs.
When deciding which systems to include, consider the consequences of equipment failure. Systems or components that should be prioritized include the following: items that can create bottleneck situations, items where failure can lead to widespread damage, and items that can cause a significant interruption of production.
Be sure to consider equipment that’s vital to facility operations: It should be given priority. Particular attention should be given to systems or components that can affect production, life support, uninterruptible power supply systems (UPS), generators, and safety.
Equipment-failure history should also be considered. Equipment with a history of frequent failures accompanied by a change in operating temperature should be included as well.
The recommended approach when implementing an infrared program is to start small and then expand. In light of the wide range of applications for thermography, there may be great temptation to include a large number of systems initially. This can be problematic, particularly when manpower is in short supply. Such shortages can occur when instituting a new program for which no additional personnel have been allotted.
STEP 2: Make an Inventory List
Once you’ve decided which equipment to inspect, it’s time to categorize it. To do this, you will need to generate inventory lists or inspection routes. Ideally, routes will be lists of equipment to be covered during infrared inspections that will, in turn, serve as blueprints for future activities.
It’s recommended that routes contain no more equipment than can be inspected in a single workday. It should be noted that industry standards require an inventory list to be included for all equipment inspected during an infrared inspection of electrical and mechanical systems. If infrared inspections have already been performed, look to inventory lists that may already exist.
Ideally, routes should be of the same class or hierarchy. Whenever possible, use the same routes as those that have been generated for other PdM technologies, i.e., vibration analysis, ultrasonic inspections, or lubrication testing. When generating routes, one should also give consideration to travel time and set-up at each inspection location. In some facilities, it may be more effective to group equipment or systems by area or building, rather than equipment type.
STEP 3: Assign Inspection Frequencies
Once routes have been generated, inspection frequencies must be assigned. For some systems, annual inspections may be sufficient. For others, semiannual inspections, such as quarterly or monthly, may be warranted. To effectively determine the frequency of infrared inspections for subject systems, be sure to keep the following points in mind:
* Whenever possible, review data from systems that have previously failed. Equipment that exhibits a change in operating temperature prior to failure should be included.
* Typically, inspections should be performed at a frequency equal to the experienced or expected half-life of prior failures. For example, a particular type of rolling element bearing is failing once every six months. Initial inspection frequency should be set to once every three months. For condition monitoring, 10 measurements are needed to generate an accurate statistical trend.
* When setting inspection frequencies, it’s important to consider stresses on the subject equipment. Equipment that is subject to extreme hot or cold temperatures, constantly changing load, running at or near capacity, or exposed to physical stress should be inspected more frequently.
* Adjust frequencies as necessary. A key component of an infrared program is that inspection frequencies are adjusted periodically. As the inspection program begins to provide meaningful data, it is expected that the number of exceptions per inspection found will decrease over time. As this occurs and system reliability improves, adjusting inspection frequencies will help to free up manpower to perform inspections elsewhere.
STEP 4: Set Temperature Limits
The next step is to set temperature limits. For qualitative inspections, temperature limits need not be hard values. Rather, our temperature limit for a qualitative inspection is that any inexplicable temperature rise is reported as an exception. (Those who have completed a Level II infrared thermography course may wish to use quantitative data in setting temperature limits.)
When setting temperature limits, it’s possible to use manufacturers’ limits. Such temperature limits may be obtained from the equipment nameplate data such as those found on transformers and motors. For bearings and rotating equipment, temperature limits may be established using lubrication data.
Another viable way of setting temperature limits is to use site experience. Whenever possible, review operational data associated with previous failures. Typically, maintenance personnel and machine operators are aware of the temperature limits of equipment based on their previous experience. If available, use this valuable informationto help set operational temperature limits.
Always remember that heat shortens equipment life. This is true for any electrical and mechanical equipment. For wound electrical equipment, such as transformers and motors, a time-tested rule of thumb states that, “For every 10 centigrade degrees that a device exceeds its rated maximum temperature, its insulation life will be reduced by 50%.”
STEP 5: Perform Inspections
Once inspections have been planned, they need to be performed. To accomplish this, give consideration to the following.
* Select appropriate personnel.Typically, persons with an electrical, mechanical or construction background are particularly suited for thermography. Persons trained in other PdM technologies may be particularly suited as well. Other useful skills should include: the ability to effectively communicate, good investigative skills, and physical capabilities suited to the inspection challenges including the ability to see color.
* After personnel have been selected for the task, make sure they obtain unbiased training and certification. Infrared training courses are generally listed by levels that range from one to three. Such levels generally correspond to levels of qualification for test personnel as defined by the American Society of Nondestructive Testing (ASNT) and the International Organization for Standardization (ISO). In selecting formal training for thermographers, be certain to choose a reputable training firm that does not have a bias toward a particular brand of thermal imaging equipment.
* Be sure to get repeatable data. For trending, it is imperative that such data are collected during each inspection to help ensure repeatability during future inspections.
Note that all infrared inspections should be documented in accordance with published standards. Properly documented findings include thermograms and control photographs for each exception identified, along with all pertinent data surrounding each thermal anomaly. Using a quality software program to manage data and generate infrared inspection reports will help to ensure that all requisite data are collected and properly stored for future reference.
STEP 6: Generate a Work Order
Whenever possible, tie your infrared findings into your CMMS (computerized maintenance-management software system). Entering data from an infrared inspection into your CMMS allows access to that data for future reference and reporting. When appropriate, generate a work order detailing inspection findings and the anticipated repairs or actions required.
Once a work order has been generated, ensurethat it is routed to the appropriate repair team or department responsible for the subject component. Make certain that technicians with the appropriate skills are assigned to the repair. Furthermore, it’s imperative that repairtechnicians understand the information contained in the infrared inspection report and what they should be looking for when they investigate each thermal anomaly.
If possible, obtain any damaged components associated with an inspection. Such components can provide valuable insight as to failure mechanisms or equipment weaknesses. Studying damaged components allows thermographers to add to their experience base and better anticipate how similar failures may appear in the future.
STEP 7: Re-Inspect All Repairs
An important part of an infrared inspection program is to re-inspect all repairs. Re-inspecting after repair efforts have been expended is the only way to ensure problems have been solved.
It’s alarming to perform a follow-up inspection and discover that nearly all problems originally reported still exist even after repair efforts have been reportedly expended. It should be noted that an infrared inspection program is only as effective as the completed repairs. Whenever possible, note the type or cause of the problem that was found.
Upon completion of repairs, it’s important to note what materials were used for repair. This information can be extremely valuable when obtaining parts or planning for similar future repairs.
In addition, note how much time it took to complete the repairs. Whenever possible, be specific and document the number of man-hours. Again, this is useful for planning similar repairs in the future.
Be sure to thermographically re-inspect each repaired component within 24 to 48 hours of repair or retrofit. This is particularly important in ensuring that the repairs have been effective and new problems have not developed.
STEP 8: Document Savings and/or Avoided Costs
At the completion of an infrared inspection, it is imperative to document savings or avoided costs. Eventually, this information will be essential for the continuation of an infrared inspection program.
For example, during lean periods, managers may ask questions about the program in terms of, “What have you done for me lately?” The inability to answer with hard factsmay be the undoing of your infrared inspection program, since in-house programs must be continually sold. Don’t assume that management will know the value of your program unless you communicate with them. Fortunately, thermography is a very graphic tool that most people can quickly comprehend.
When generating a cost-savings report, always use conservative figures. Sticking to the most proximate and conservative figures will leave less room for argument and may lend more credibility to your estimate. This is important because avoided costs can add up so quickly that others may be suspicious of large dollar figures. Often, the larger the potential savings, the more prone others are to disbelieve your figures.
STEP 9: Conduct Root Cause Failure Analysis
At the completion of effective repairs and re-inspection, it’s recommended that Root Cause Failure Analysis (RCFA) be performed. For each exception found, the root cause of the problem should be investigated to determine if the issue was caused by design, workmanship, or material failure.
The resulting information can be invaluable for improving a company’s engineering designs, installations, material procurement, and/or maintenance practices. It can have even greater impact upon a company’s bottom line, especially when it results in a permanent improvement to a process or system.TRR
EDITOR’S NOTE: A version of this article first appeared in an “Article of the Month” on irinfo.org.
ABOUT THE AUTHOR
Jim Seffrin, CMRP, has been an Infraspection Institute Certified Infrared Thermographer® since 1984. Co-founder of Jersey Infrared Consultants and a practicing thermographer with 35+ years of experience as an infrared consultant, he was appointed Director of Infraspection Institute in April 2000. A Level III Infraspection Institute Certified Infrared Thermographer® and Certified Maintenance Reliability Professional (CMRP), he has written numerous articles, co-written existing standards, and frequently works as an expert witness on projects involving thermography. For information on a wide range of topics related to infrared thermography, visit IRINFO.org and/or infraspection.com, or email jim@infraspection.com.
Tags: predictive maintenance, PdM, thermography, infrared cameras, thermographic imagers, condition monitoring, equipment inspection, training, certification